Colored Ice! 

Thinking of painting in a different style, I tried to follow other moms who use food coloring and water. The new idea is to put them in a ice cube tray and freeze them!

  
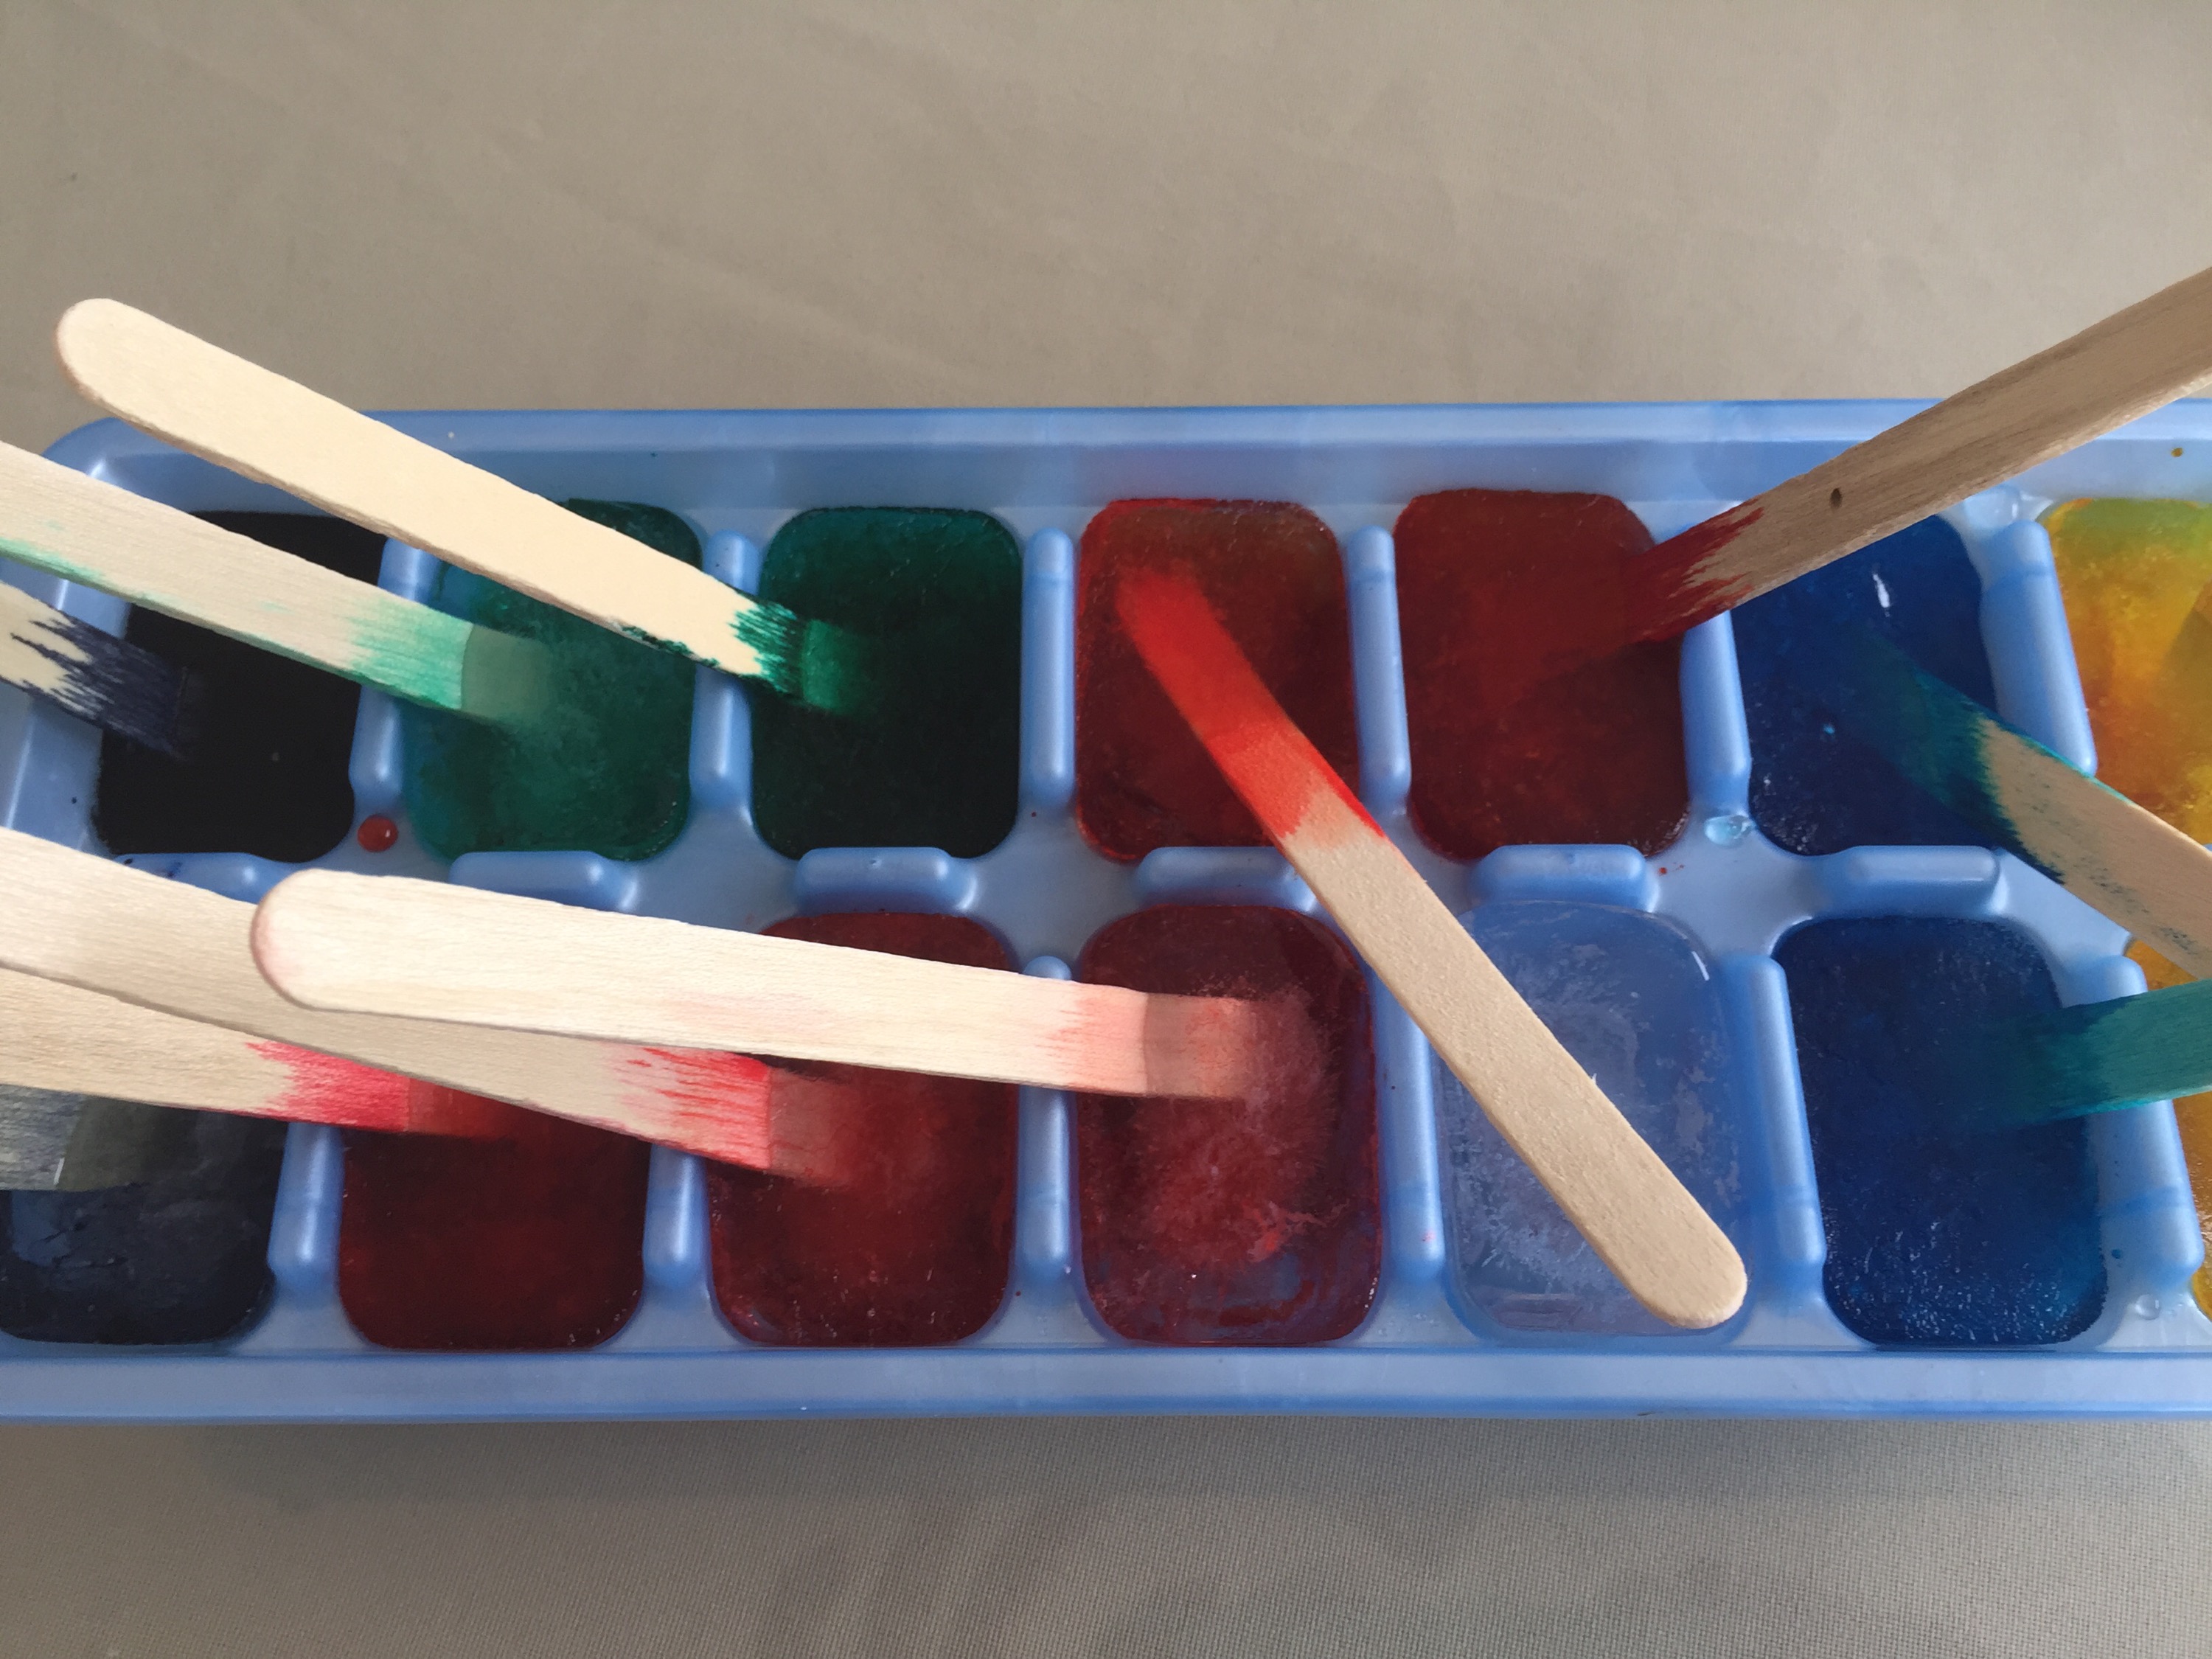
I placed Popsicle sticks a little early, so my ice cube tray looks like this. It still was as good because it still was able to pull out the colored ice cube. My son was excited with his new medium for art! 

  
What we used was a cartolina paper. I also recently ordered some tables and chairs from a dear designer friend, Rain Ramas. This is where Joshua can do his activities. I find it so important that Joshua will be able to reach and do things in his level and height.

  
Okay, my son started to talk about what he was doing and he has some application from our recent visit to Mind Museum. He said that he was making planet earth with the stars! A little bit of science input there. He is beginning to understand that we live in planet earth and that there is a sun and moon, with other stars and planets. The movie “Home” also made it clear that there is a big universe or space out there where the stars are, and that we live on planet earth. 

  
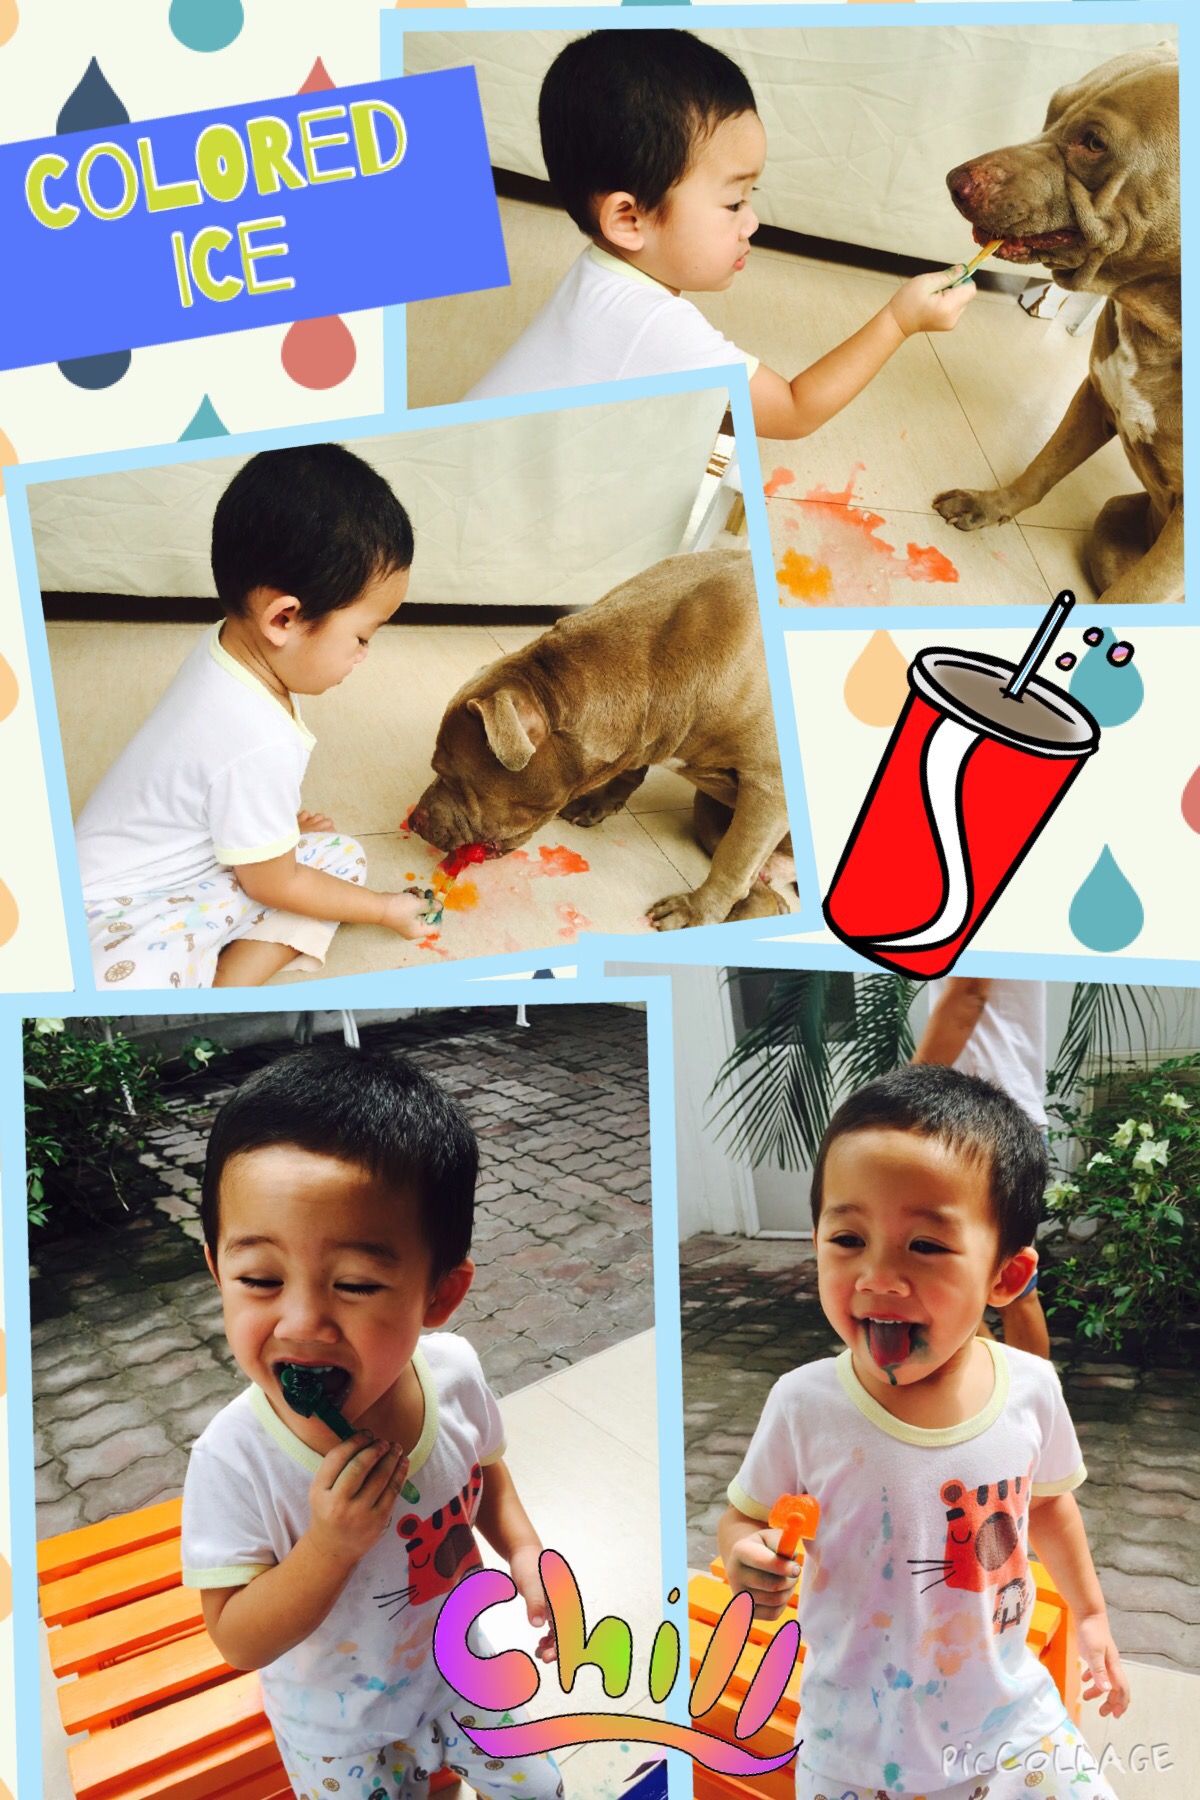
I am seriously amazed at my son’s growing knowledge and imagination. This was the first work he did on ice cube paint! It was so fun we ended up having to do another cartolina paper. But Joshua ended up letting our dog eat the remaining ice and he enjoyed eating this edible colored ice too!

  
This is really one fun, fun, fun activity for 2-3 year olds. But I say, even a 38 year old mom like me, enjoyed it too! 😄😄😄

Advertisement

Home made and Edible finger paint!

I love activities that are home made! First you know the ingredients and make sure they are safe for kids. Second, home-made activities can be a bonding time for you and your child. Third, when it’s made at home… It’s made with extra effort and lots of love!!! 

Here is how to make home-made and edible finger paint. You will need these:

  • Flour
  • Filtered water
  • Food coloring
  • Bowls and plastic cups
  • Optional: flavoring (e.g. Vanilla, banana etc)

So the ratio is 1 cup flour to 2 cups water. If you add or lessen the recipe just follow the ratio –1 flour : 2 water.

  
It will look like a bowl of soup. I let Josh help me mix all the ingredients together and let him make this batter. From here we will now need a saucepan and spoon to mix this over heat. 

  
This batter will thicken in a few minutes so pay attention because you cannot over cook this one. When it starts to lump, put off the stove and mix it as it cools.

  
Now we start coloring. I would place in smaller bowls and decide to teach Joshua how colors are made. You really just need yellow, red and blue. From there you can make orange (yellow+red), green (blue+yellow), and purple (red+blue). My son enjoys mixing the colors! You can add drops of flavoring here too — in case they eat it. Hahahha! Then we put them in separate plastic cup containers.

  
Once the friends came over, each one had to bring their own Cartolina paper to work on. It was time to explore this paint with their hands and even their feet! It was sooo fun!